Developing Cluster API Provider Hetzner
Developing our provider is quite easy. Please follow the steps mentioned below:
- You need to install some base requirements.
- You need to follow the preparation document to set up everything related to Hetzner.
Install Base requirements
To develop with Tilt, there are a few requirements. You can use the command make all-tools to check whether the versions of the tools are up to date and to install the ones that are missing.
This ensures the following:
- clusterctl
- ctlptl (required)
- go (required)
- helm (required)
- helmfile
- kind (required)
- kubectl (required)
- tilt
- hcloud cli-tool.
Preparing Hetzner project
For more information, please see the Hetzner project preparation guide.
Developing without Tilt
You can create a development environment like this:
make cluster: Creates kind cluster.make create-mgt-cluster: Makes kind cluster a mgt-cluster: installs capi and caph into the mgt-clustermake create-workload-cluster-hetzner-hcloud-control-plane: Create workload cluster with hcloud control-planes, and hcloud machine deployment and a baremetal machine deployment../hack/update-operator-dev-deployment.sh: To update the caph container to the code of your git repo.
We recommend creating a .envrc file and specifying the values you need. After the .envrc is loaded (direnv.net), invoke direnv allow to load the environment variables in your current shell session.
Developing with Tilt
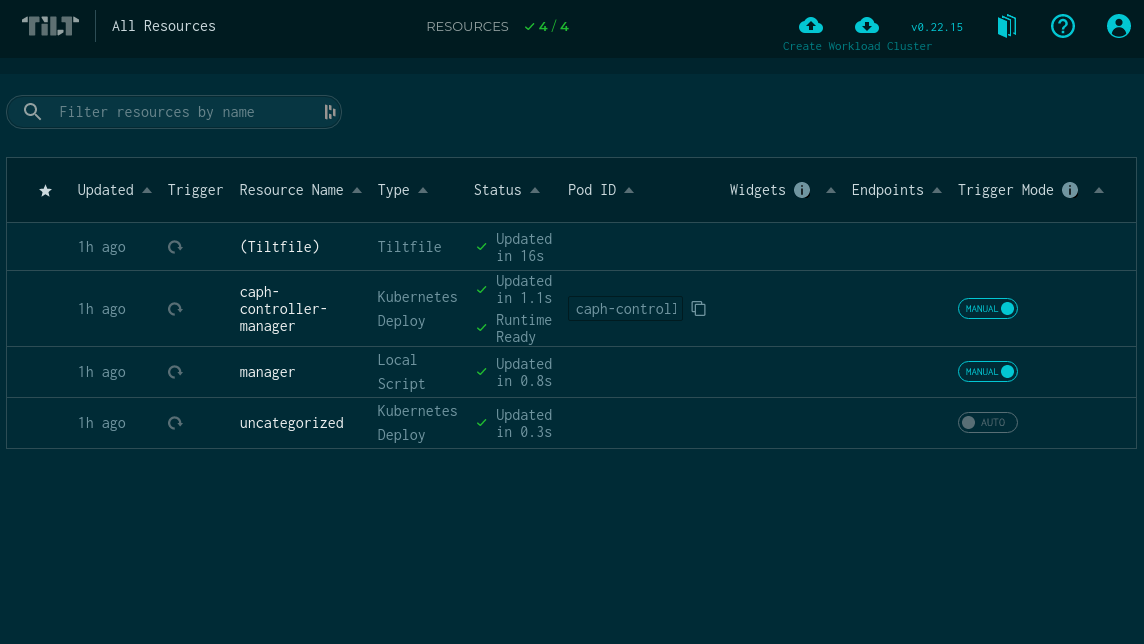
You can use Tilt to install your changed code in the management cluster.
We do not update the Tilt configuration regularly. If unsure use Developing without Tilt.
The complete reference can be found in the Reference of Tilt documentation.
To build a kind cluster and to start Tilt, run:
To access the Tilt UI, please go to: http://localhost:10351
Once your kind management cluster is up and running, you can deploy a workload cluster. This could be done through the Tilt UI by pressing one of the buttons in the top right corner, e.g., "Create HCloud Cluster", if you want to start a HCloud only cluster, or "Create Baremetal Cluster - with hcloud control-planes", if you want to use baremetal worker.
The buttons are defined in Tiltfile. There you see the corresponding makefile targets, if you prefer to use the command line.
You can use make watch to get an overview. It shows continously:
- infrastructure resources in your mgt-cluster
- logs of caph and capi controller
- events
To tear down the workload cluster, press the "Delete Workload Cluster" button. After a few minutes, the resources should be deleted.
To tear down the kind cluster, use:
To delete the registry, use make delete-registry . Use make delete-mgt-cluster-registry to delete both management cluster and associated registry.
If you have any trouble finding the right command, you can run the make help command to get a list of all available make targets.
Troubleshooting
If you want to have a better overview about what is going on in your management cluster, then you can use the following tools.
This script continuously shows the most important resources (capi machines, infra machines, ...) and logs of caph and capi. Run this with your management cluster kubeconfig active.
check-conditions shows all unhealthy conditions of the current cluster. You can use it in both the management and workload clusters.
Submitting PRs and testing
Pull requests and issues are highly encouraged! For more information, please have a look at the Contribution Guidelines
There are two important commands that you should make use of before creating the PR.
With make verify , you can run all linting checks and others. Make sure that all of these checks pass - otherwise, the PR cannot be merged. Note that you need to commit all changes for the last checks to pass.
With make test , all unit tests are triggered. If they fail out of nowhere, then please re-run them. They are not 100% stable and sometimes there are tests failing due to something related to Kubernetes' envtest .
With make generate , new CRDs are generated. This is necessary if you change the API.
Running unit-tests locally
Developing unit-tests (which do not need a running cluster) are much faster. We recommend to do that.
A common way to run one particular unit-test is like this:
Explanation:
reset: Reset the terminal so you can scroll back to the first line of output easily.DEBUG=1: Set log-level to "debug".ginkgo run --focus "foo" ./controllers/...: Run tests in the controllers directory, but only those whoseIt("...")contains "foo"../hack/filter-caph-controller-manager-logs.py -: Filter the output to avoid being overwhelmed. You can configure the script to exclude lines or individual key/value pairs of the JSON log lines.
Running local e2e test
If you are interested in running the E2E tests locally, then you can use the following commands:
For the SSH public and private keys, you should use the following command to encode the keys. Note that the E2E test will not work if the ssh key is in any other format!
Creating new user in Robot
To create new user in Robot, click on the Create User button in the Hetzner Robot console. Once you create the new user, a user ID will be provided to you via email from Hetzner Robot. The password will be the same that you used while creating the user.

- Previous
- Annotations
- Next
- Reference of Tilt